One Room Challenge Week 2: Lots of Paint & A New Light Fixture
Hello! Week 1 of my first One Room Challenge has officially ended! (Click here to go back and check out my Week 1 post)
I finished painting the closet area of our room Repose Gray by Sherwin Williams and painted the baseboards Pure White (also from SW). In addition to painting the baseboards, I’m also going around and caulking between the bottom of them and the floor. It looks like there may have been wall to wall carpeting in our room at some point because there is a decent sized space there. This step is going to add a lot of time to my project, but we have these tiny spiders that like to hangout up by our ceiling and I’ve read that they can get in through cracks in your baseboards. Spiders are the bane of my existence, so I’m willing to spend however much time I need to in order to keep them out of our house!!


I’ve also made a lot of headway in the shopping department. I went to IKEA and bought a new pendant for our closet area—and it was on sale for $5.99! I thought it would be an easy switch for me (even though I’ve never done it myself before… I’m starting to see where my son might get some of his false confidence from). So I switched the breaker to off, and then unscrewed the old light fixture. Once I took it off, the inside of ours looked nothing like the pictures I found on the internet! Ours has a lot of other wiring in it aside from just the wires to hook the light up. So I had to call in some backup from my dad! My dad came over and took a look at it- turns out that even though I switched the breaker to this light off, there were still live wires in there!! Luckily, I didn’t touch any when I was trying to replace it! He was able to figure it all out and get the light hung. He also gave me his volt sensor in case I get the urge to replace any more lights! LESSON LEARNED: Always flip the main breaker when doing electrical work!!
Also in this part of the room, I bought a wood spice rack from IKEA to hang up- originally thinking I would hang it upside down and use the bar to hang necklaces on. I did this and ended up not liking how it looked. I want to keep a simplified look, and the necklaces hanging down were too much of a distraction. Plus, I really don’t wear big necklaces very often anymore (Nathan pulls at them!) and I have more than enough room to hang them in our closet. All I really need the shelf there for is a place to put my wedding rings at night. So I flipped the shelf over and I love it!
Some other things I bought from IKEA: a small striped rug, black wall hooks ($2.99 for a 2 pack—I might go and grab several more packs just to have!), wood wall hooks, wood wall frame, wood bench (only $39!), 2 pillow covers, and a large thin white bedspread. In total, I spent around $150- I signed up for the IKEA family card and got a coupon for $20 off a purchase of $150 or more. I had kind of always assumed that since IKEA prices are already so low, that they didn’t have coupons or sales… but I saved a decent amount of money just by signing up for the family member card!
I also stopped at Target & TJ Maxx. I picked up a simple table lamp for our dresser at Target for about $20. At TJ Maxx I found a gorgeous throw blanket for $16 and a rectangle throw pillow (I think its 12”x24”) for $12. The throw pillow isn’t what I originally had in mind- it’s a gorgeous dark green velvet- but I knew the price couldn’t be beat and it still fits in perfectly with my design.
I’ve been to a couple of different consignment and antique stores as well. I still haven’t found a pair of vintage nightstands, but I haven’t lost hope! I did find an oval wicker mirror for $12 though! Right when I saw it, I knew it would be perfect for the closet area. I have a feeling there will be plenty of minor changes to my original design as I keep shopping—it’s obviously impossible to plan for the treasures you might find when vintage shopping.
STILL ON MY TO-DO/ TO-BUY LIST:
Paint rest of the bedroom walls Pure White
Caulk baseboards
Paint baseboards and window trim
Move dresser + switch out knobs
Find nightstands
DIY black and white abstract art
Find area rug
Find window coverings (I think I’ll have to settle for drapes since they’re more affordable)
In this post I also wanted to include more of what I’m using as inspiration and a little deeper insight to how I go about designing a room. I mentioned that I am going for a neutral, calm feeling- and that I’m using some rooms by Amber Lewis as my inspiration. Here are some bedrooms designed by her that I love:
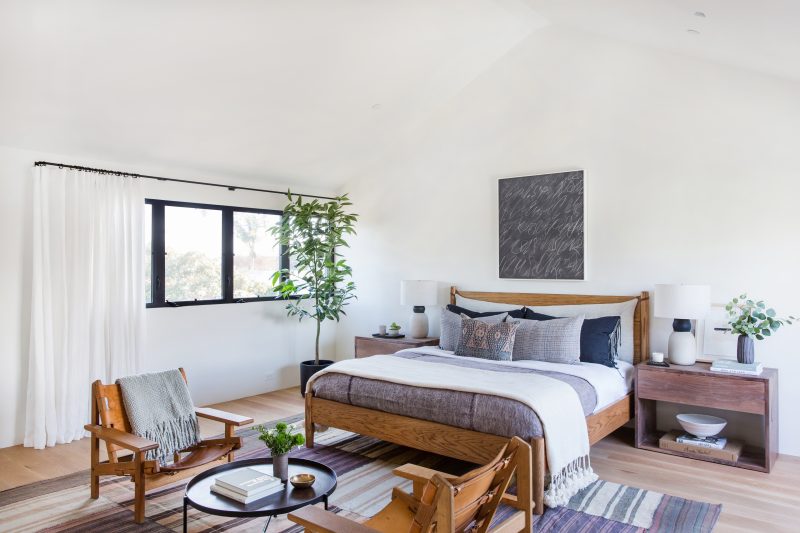


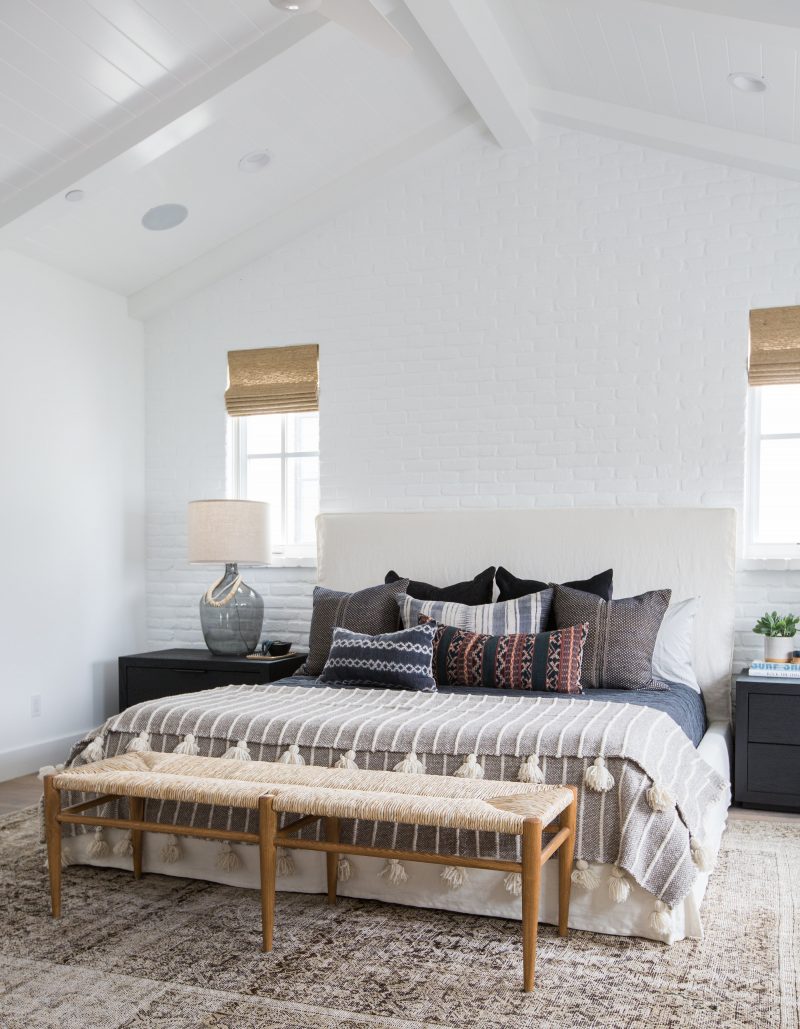
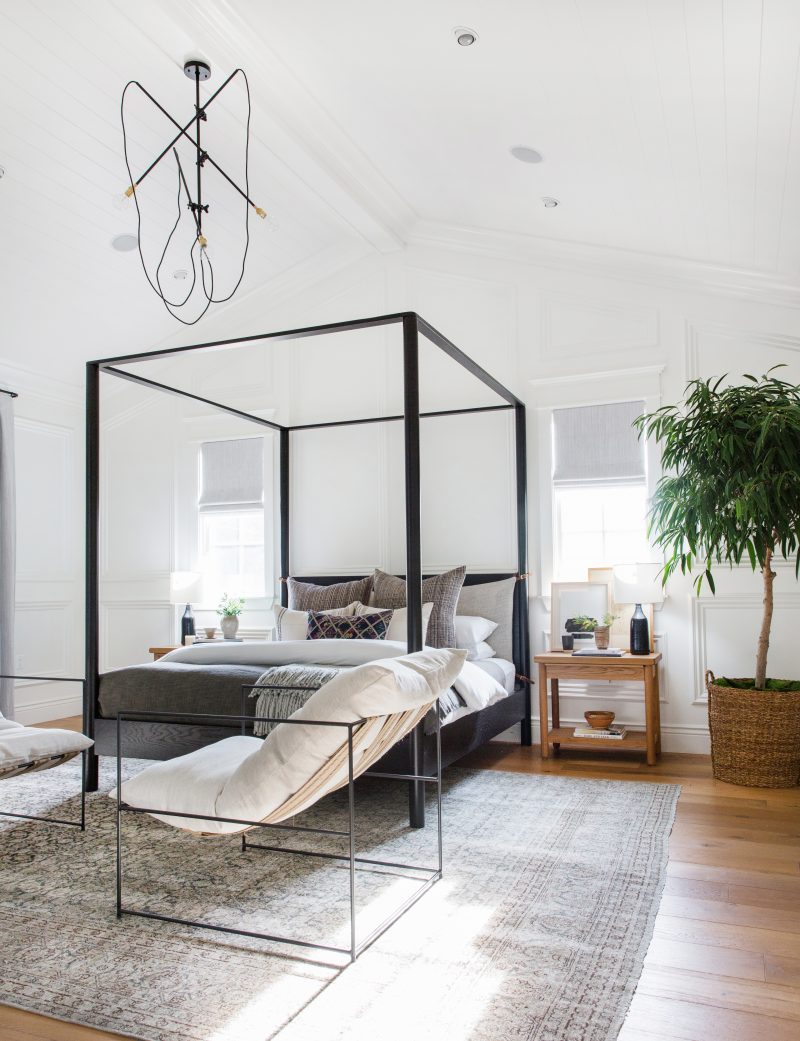
Once I have my inspiration photos, I analyze them and pick out what they have in common- this helps me understand what it is I’m really looking for. I could definitely try to just recreate one of her looks on a budget, but I think studying the looks and figuring out why different things work well together helps me more in the long run.
Aside from a relatively neutral color palette and furniture with clean lines, I picked out 5 things that I always love about her designs and are things I can keep in mind when putting our room together.

1. The Color Black: All of her designs have black in them in some way.
2. Mix of Textures: Whether it’s a shag rug, woven bench, or pom throw blanket- Amber Lewis is amazing at mixing different textures! This is the best way to keep a neutral room from feeling boring.
3. Wood: All of these bedrooms have some type of wood furniture or accessory. It warms up the design, and keeps the rooms from feeling too modern.
4. Greenery: The angles I have of these rooms don’t show the greenery in each one- but it’s there! Hanging plants or big trees are definitely my go to for when I’m stumped on what to put somewhere! Also— try to picture the bottom two photos without the greenery… they would be so boring and bland! The pops of green really bring a lot.
5. White Walls: I obviously love white walls (our whole house is white except the dining room). Fresh white paint is so pretty, and provides a great backdrop to make your design stand out!
There is obviously a lot more that goes into designing a room, but doing this exercise helps me focus my thoughts and ideas.
That’s all for this week!! Be sure to check back next Thursday for another progress update! And follow along on my Instagram :)
Check out the other guest participants here & the featured designers here!
