How to Update Your Kitchen without Painting Your Cabinets
I posted a photo of my kitchen on my Instagram today and mentioned how we painted our cabinets white when we first moved in. It was definitely the quickest and most affordable way for us to brighten up the space. But I also completely understand why someone wouldn’t want to go this route - whether you don’t have time (it’s a big undertaking), you don’t want to do something so permanent to your cabinets because maybe they’re not that old and still in great condition (even if you don’t like the color), or you just want to try an easier and quicker solution! I’ve put together some ideas for ways you can give your kitchen a little face lift without having to paint your cabinets!

Before I get into what products you can switch out or add to your kitchen, I want to briefly touch on color theory. This topic is something that I’ve been studying recently, and there is SO much to learn about it! In the interest of staying on topic though, I’m only going to mention on thing about it. I’m assuming the issue that most people have dated cabinets is the orange tone that used to be so popular for whatever reason! Color theory comes into play here because if you understand what colors complement each other (aka brighten and intensify each other) then you can try to avoid using those in your kitchen!
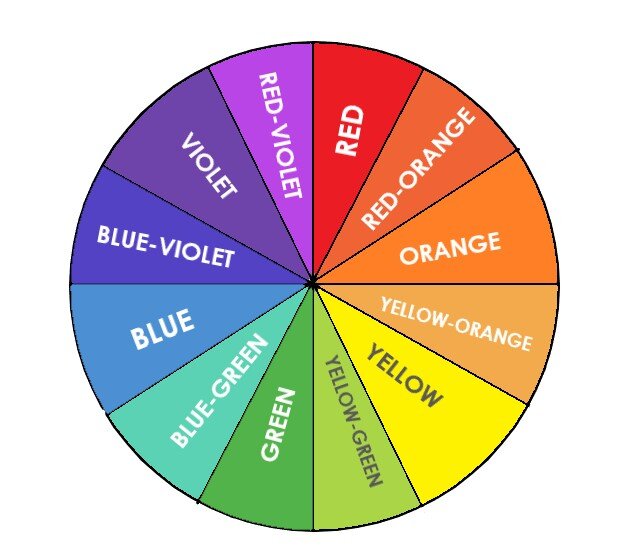
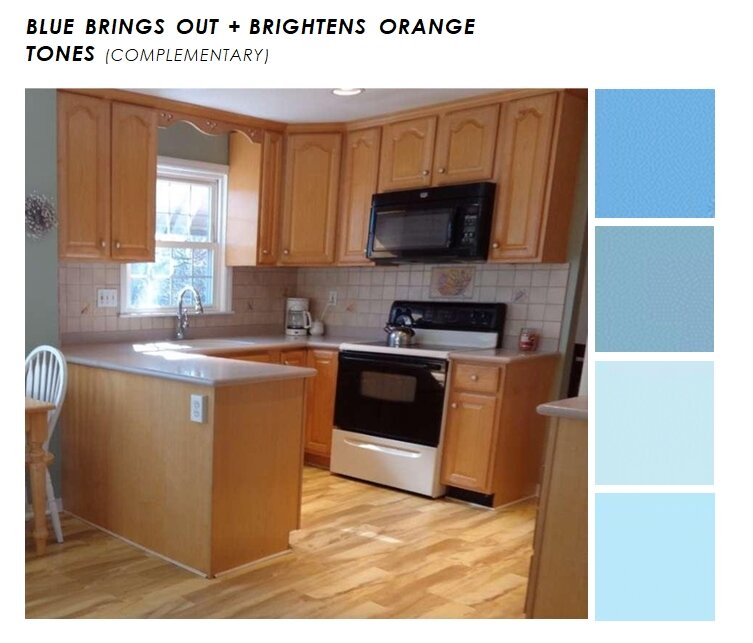
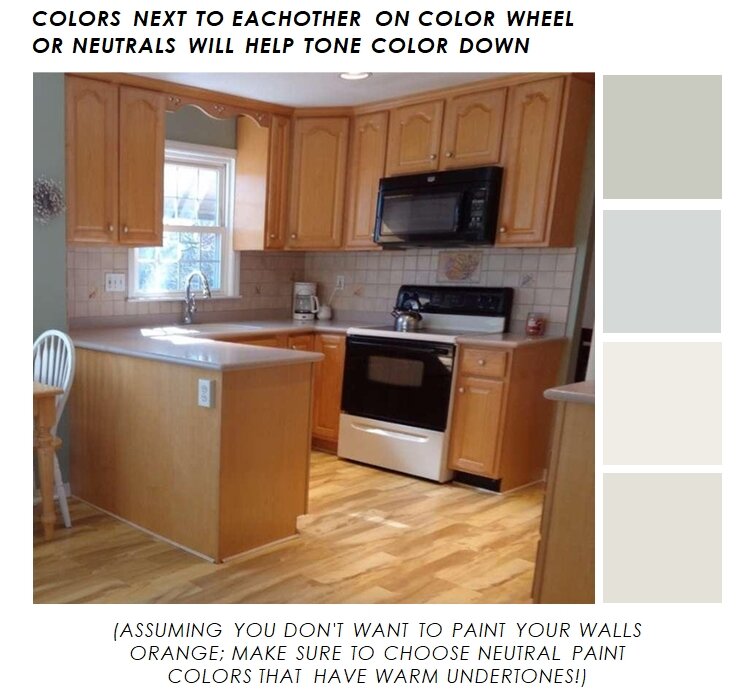
I put together this super professional looking color wheel for this post! :-) Complementary colors are the colors across from each other on the wheel. You can see that blue is the complement of orange. So if you’re trying to tone down the appearance of orange tones in your cabinets, you’re going to want to avoid decorating with blue. To tone down a certain color, you’ll want to use colors close to it on the color (or neutrals).
I took the listing photo of my kitchen (and it’s wonderfully orange oak cabinets) and put paint swatches next to it. First I did blue colors, and then I did warm neutrals. You can kind of see how the blues brighten up the orange tones in the cabinets.
The kind of light bulbs you use will also play a big role in how the colors in your home appear. If you’re like me and get completely overwhelmed in the light bulb aisle (why are there SO many choices??) I found some info to make it easier for you. Terms like “Soft White” & “Bright White” don’t always mean the same thing from brand to brand, so you’ll need to go by their color temperature. Somewhere on the box, you should see a number in the thousands with a “K” at the end. This is the color temperature. Temperatures in the 2700K to 3100K range will cast a warm white, 3500K is a neutral light, 4000K is a cool and bright light, & 5000K to 6500K is closest to daylight. For the purpose of downplaying orange tones, I’d recommend sticking with bulbs in the 3500K to 4000K range.
Now that colors + light bulbs are out of the way, I can get into my other design suggestions!
I was looking at the listing photo of my own kitchen and trying to think of what I would do to it if we hadn’t painted our cabinets.

01/ First I would update the backsplash (I ended up painting ours- which is a super easy solution)! If you wanted to remove the old backsplash and start new though, it’s apparently a pretty simple DIY - I’ve read it’s a great beginner project! I would choose a neutral backsplash like this white penny tile or to make things easier, there are SO many peel and stick options available (like this hexagon “tile”)!
02/ Update your lighting! A lot of kitchens have some type of light above the sink… here’s a secret about ours: I bought a cute pendant from IKEA with the intention of having my dad replace the fluorescent light above our sink. When he started to remove the old light, he discovered that it was just a simple replacement job (I forget why) and that we’d need to have an electrician come out. But being impatient, I wanted to see how the new pendant would look - so I hung it up with command hooks, and it’s still like that to this day lol. Completely non-functioning pendant light over our sink! Whoops!
03/ Update your window curtains/shades. We don’t have shades on our kitchen window because the sun doesn’t bother us at all and we also don’t have neighbors behind us. But if either of those were an issue, I would definitely get some simple bamboo shades or fabric shades. Cafe curtains can also look really cute, and I made my own no-sew version a while ago - you can see that post here!
04/ Get a new faucet! If you have dated looking faucet, replacing it is a relatively simple DIY that can make a big difference! There are plenty of affordable options out there too, so it doesn’t have to cost a ton. This black one I found is only $80!
05/ Update your hardware. I’m not going to lie - hardware can be pretty pricey! But it can also really change the feeling of your space, especially if your current hardware is particularly outdated. I’m loving these antiqued brass knobs & handles I found! Another great option is to spray paint your current hardware.
06/ Updated accessories. The towels that hang in your kitchen can definitely make or break the design! Simple towels, like these Turkish ones, can fit into any design style and provide such a classic look.
07/ Add a beautiful vintage rug! Etsy has SO many affordable vintage Turkish rugs that are perfect for in front of your sink! These two are both under $40 (here & here)!
08/ Remove some of your cabinets and add open shelving. If you’re unsure about open shelving, you can do what I did and just take the doors off of some cabinets. Removing cabinets (or even just the doors) will obviously help your kitchen appear less orange- because you’re literally removing it from the space! I love our faux open shelving- and the doors are just down in our basement in case I ever want to put them back!
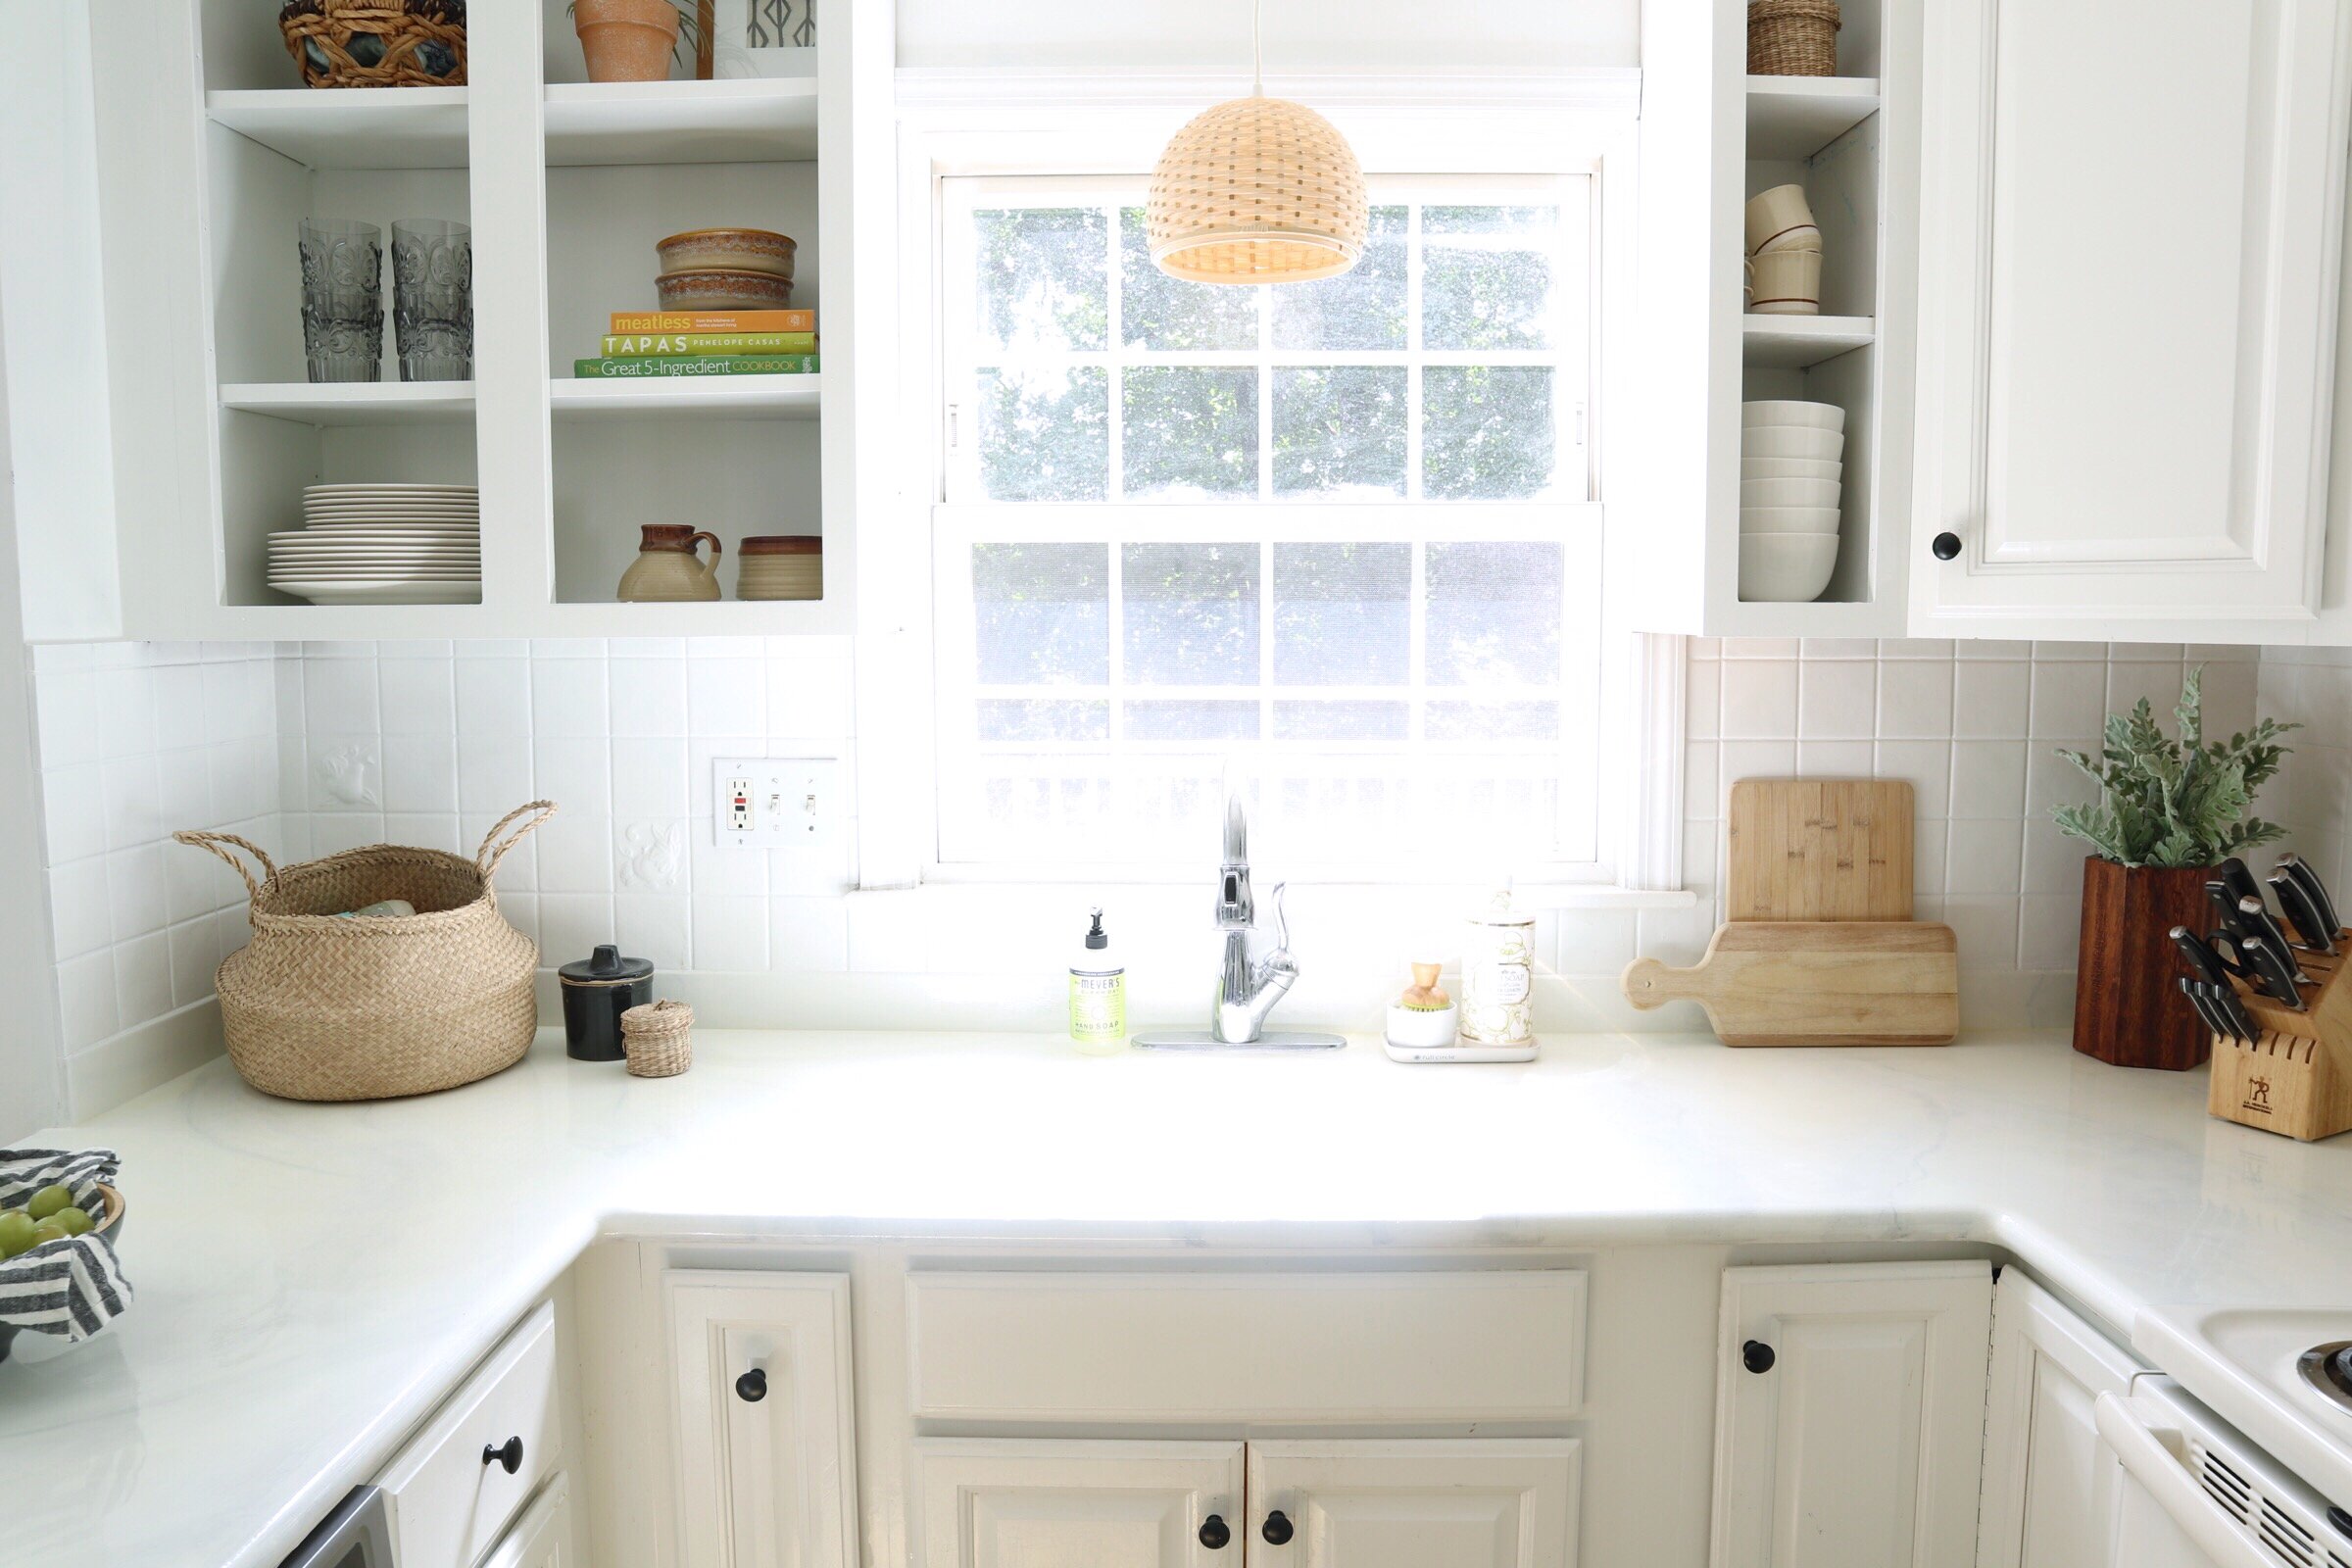
My faux open shelving… and faux pendant light lol
Those are just some ideas I had while looking at my own kitchen, but I do have a few others that I want to mention:
-Grout Paint: if you have older tile floor and the grout is beyond dirty, you can use this grout paint to refresh it and make it look brand new!
-Lighting: I know I already mentioned the light above our sink, but if your kitchen has any fluorescent lighting- replacing that would be a BIG improvement. Additionally, I think sometimes smaller pendants over an island can look dated. Try replacing them with bigger pendants or even one large pendant.
-Kitchen Island stools. Never underestimate the power of new furniture!
-Tile floor stickers. Tile floor stickers now come in a huge range of prices and patterns. If a new a brand new floor isn’t in the budget, I definitely recommend looking into this option!
That’s all for my tips, I hope you found them helpful!!


