Adding a Chalkboard Wall to the Playroom!
Last week I posted a photo of an idea for our playroom in my Instagram stories. I got such good feedback from it, so I knew I had to go ahead and run with it!
Sadly, I didn’t take any progress photos but the steps are pretty straight forward! Here is the idea that I posted:

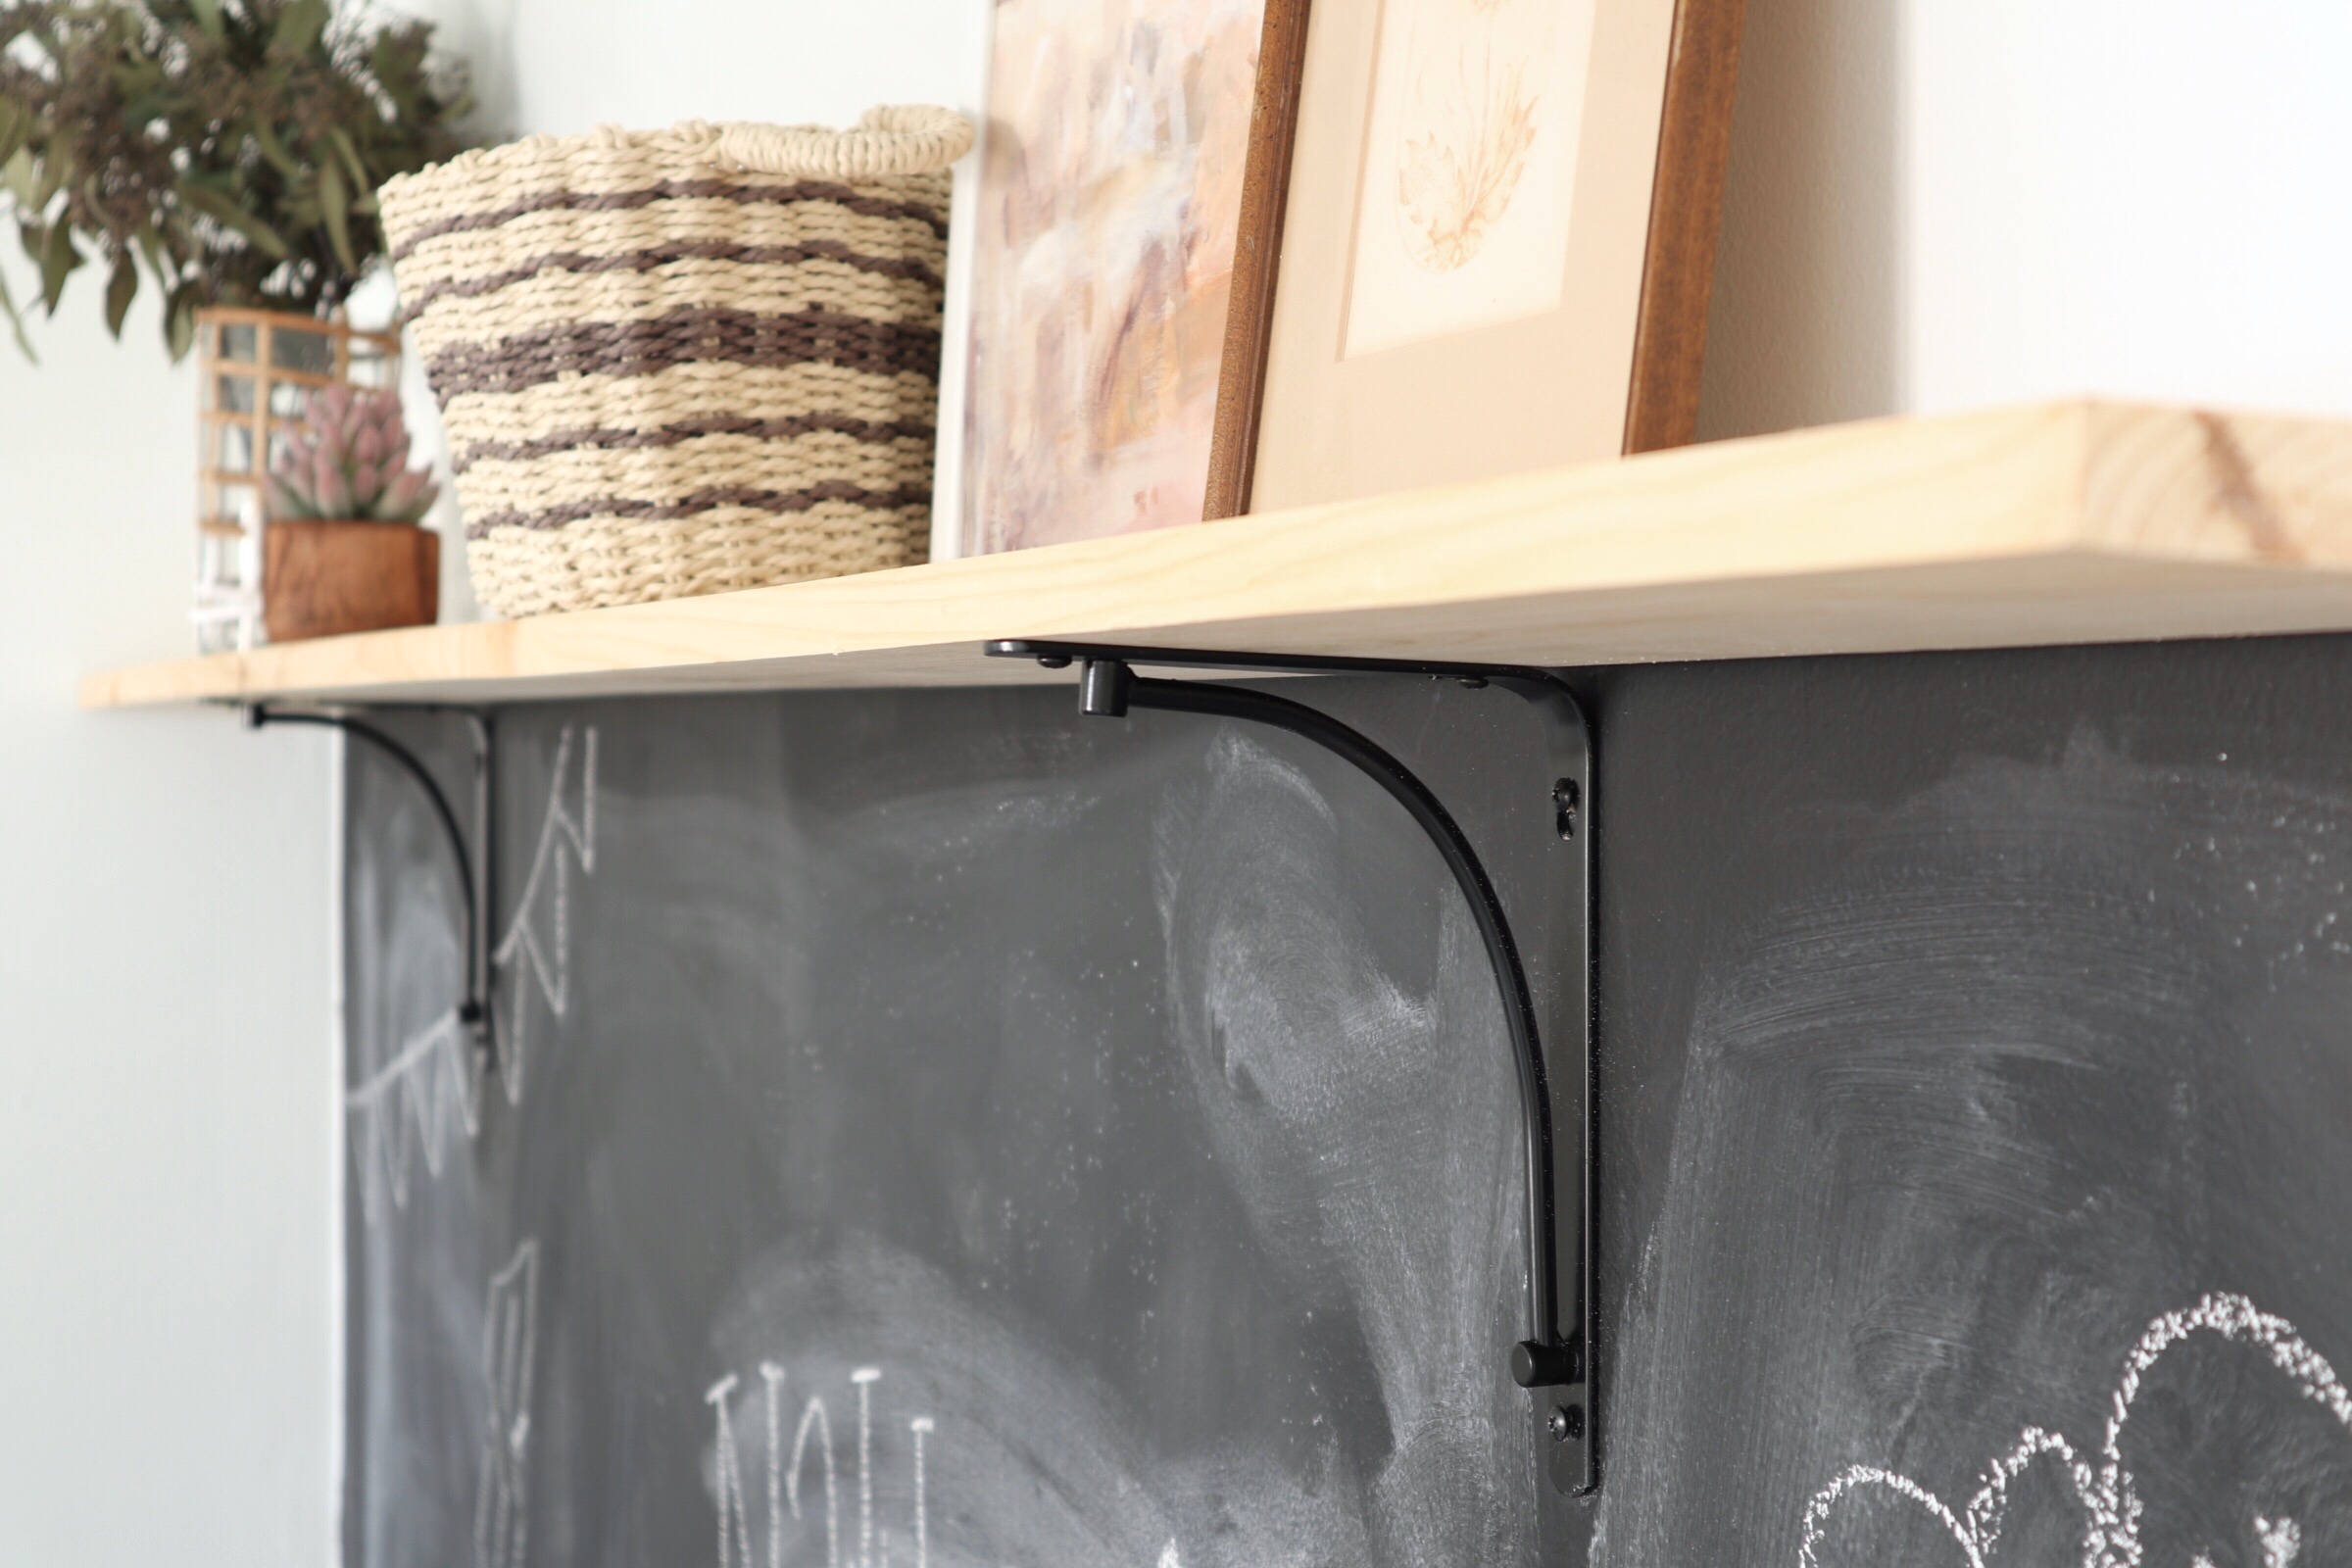
I knew I wanted a chalkboard wall somewhere, but wasn’t sure where or how I wanted it to look. I went back and forth in my head with possibly painting a shape on the wall (thinking the outline of a simple house or something). In the end though, I decided that painting it 3/4 of the way up the wall and then putting a simple floating shelf at the top would look the best!
Here is a photo of how it turned out:

I LOVE it, it’s so perfect for that space!! I’ve been having a blast doodling on it, and I know when Nathan is a little older he’ll get a ton of use out of it too! I’ll outline the steps and materials I used below!
*Please note that this post contains affiliate links, which means I make a small commission from your purchase- at no extra cost to you.
MATERIALS:
Rust-Oleum Chalkboard Paint (one 30oz can was just enough for this wall)
2 Black Shelf Brackets
1 Piece of Wood (6”x8’ and had them cut it down to 80 inches at Home Depot to fit our wall)
High Density Mini Foam Roller
STEPS:
1.) This wall used to have green stripes painted on them, so first I had to sand down the side of the stripes to make the wall smooth.
2.) Clean the wall so there is no more dust from sanding and use painters tape to tape off how far I want the paint to go up.
3.) Use the foam roller to roll on the first coat of chalkboard paint. (This stuff really stinks just FYI!)
4.) Once the first coat is dry (about 30 min to 1 hour), you can go ahead with the second coat. I didn’t use a primer so I had to keep painting on several coats. Once the first one was dry though, I didn’t really have to wait as long for the others to dry in order to keep painting.
5.) A few hours after I was finished painting, I started hanging the shelf. First I located the studs in the wall. It worked out that there were studs 16 inches in on both sides.
6.) I screwed both brackets into the wall (placing the board on top and using the level on my phone to make sure the brackets were even).
7.) After screwing the brackets in, I needed my husband’s help with screwing the wood on top. It’s good to have two people so that the board doesn’t move when you’re drilling.
8.) Style + Enjoy!
*You need to wait 3 days before drawing on the chalkboard
**The board I bought was 6 inches and so was the bracket, so there is a small space in between the wood and the wall. It doesn’t make a difference though!
The whole project ended up costing about $40 (not including tools we already had) and it was SO worth it!

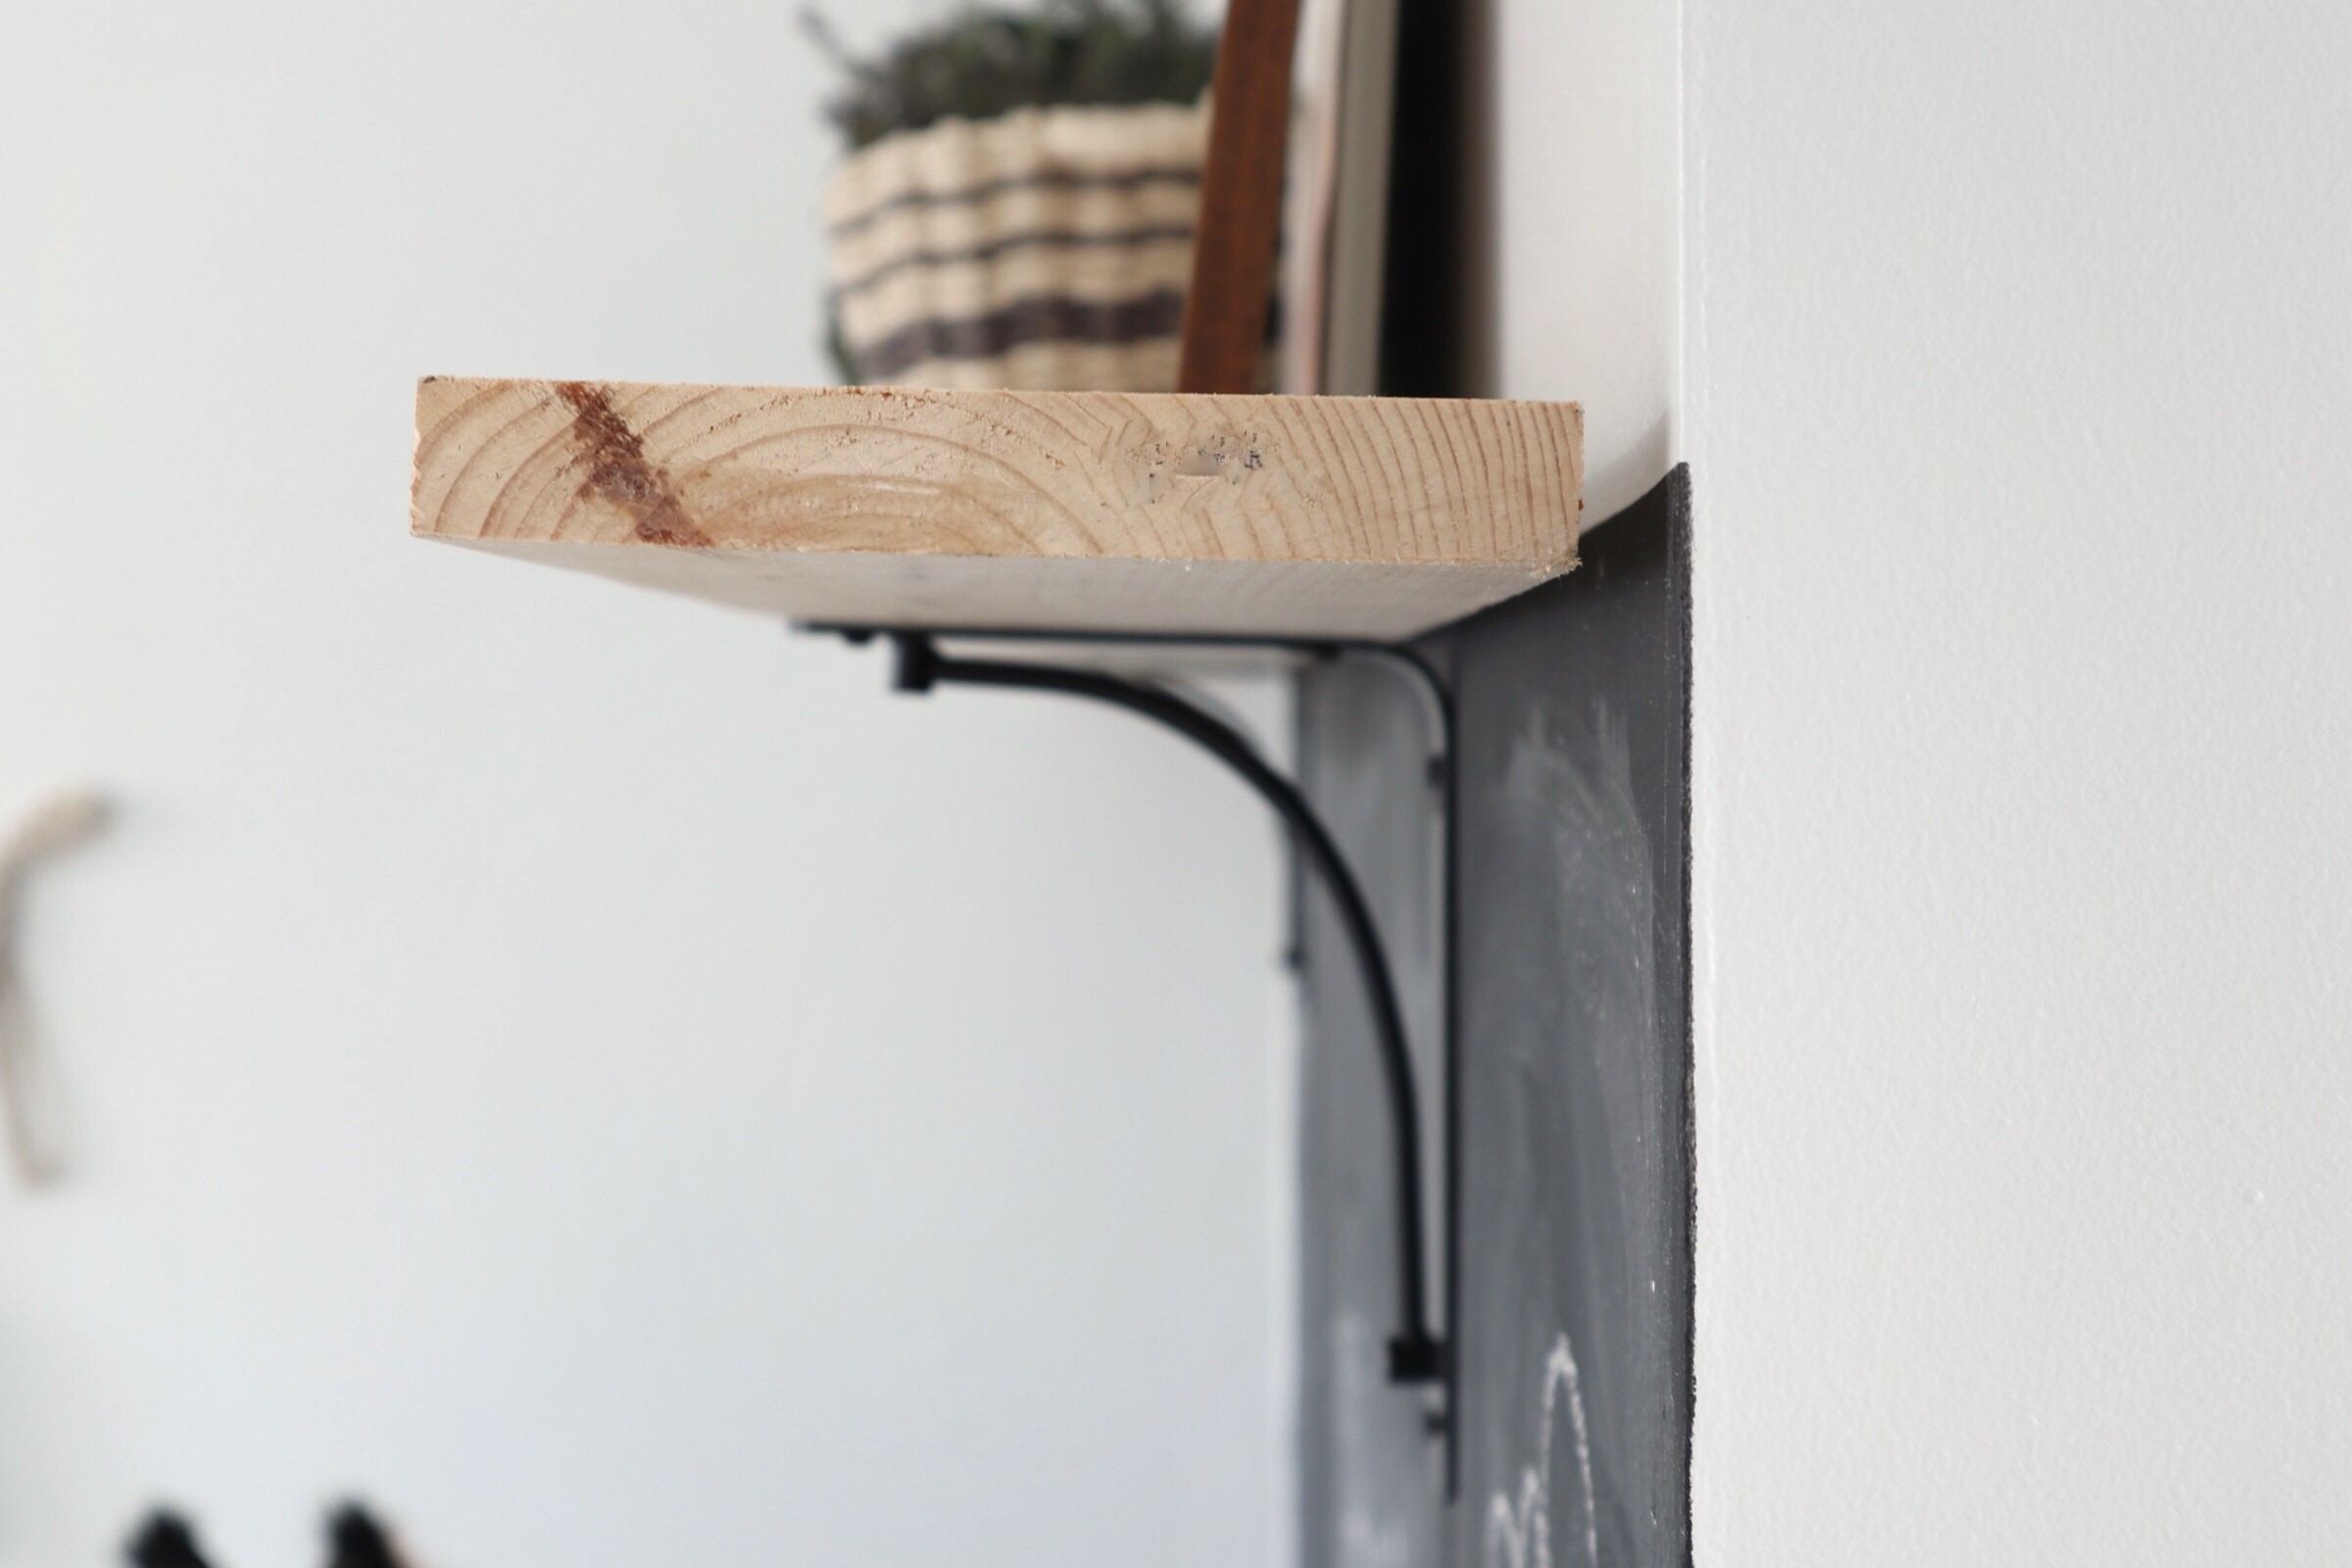
You can see the small space between the shelf and the wall in this photo.