HOW TO | Edit Your Photos
How I edit my photos for Instagram
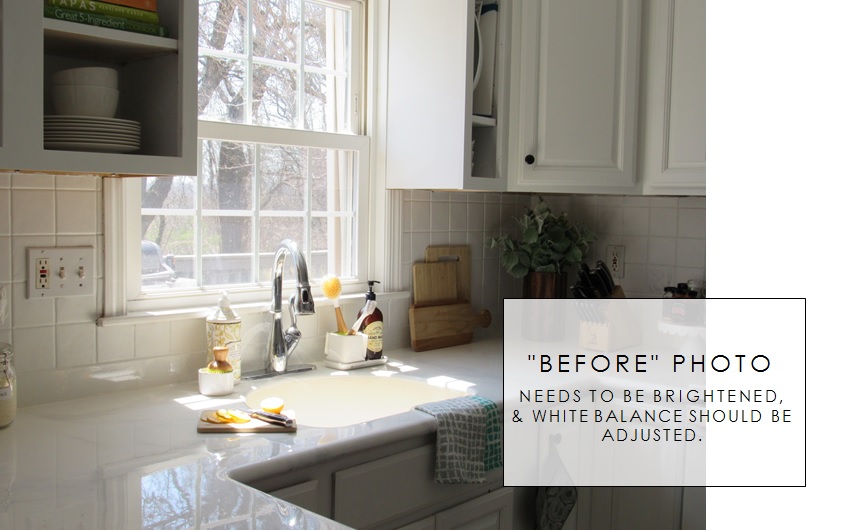
I get a lot of questions about how I edit my photos for Instagram so I decided to put together an easy step by step guide to what I do! I'm definitely not a professional photographer or editor by any means, but I do try keep the look of my photos consistent- bright & airy feeling. I've gotten these steps down through a lot of trial and error- which I think is the best way to find the look you want! The main app I use is called Snapseed, and then before I post to Instagram I usually also use Instagram's edit tool to sharpen the image a little bit. I will list out the steps and then post the photo below so it is easy to reference.
Step 1: Open the Snapseed app and open the photo I want to edit.
Step 2: Click on tools, then the "Curves" option.
Step 3: I usually click on the line more towards the top of the photo and just pull it up a little bit until I'm happy with the amount of brightness. Click the check mark in the lower right to save your changes.

Step 4: After you press the check mark to save, you will be brought back to the home page. Click on "tools" again and then "White Balance".
Step 5: It should automatically be on the Temperature Adjust control, but you can click the middle button at the button to make sure.
Step 6: Depending on your photo's needs you may need to either make it cooler or warmer. Slide your finger across the screen to the left will make it cooler, and the other way will make it warmer. Click the check mark when it looks the way you want it to.

Step 7: Click on tools again, and then "Tune Image".
Step 8: In here, I usually adjust the Brightness, Contrast, Ambiance, Highlights, and Shadows. I don't really have an exact science behind what I choose -- I usually just play around until it looks right. Press the check mark once you're happy.
Step 9: In tools, select the "Brush" tool.

Step 10: You may not always need or want to do these next steps, but it's good to know it's an option. I wanted to lighten up the corner of the counters where the vase is, and I also felt like the backsplash to the left of the window had too much of a warm tone. The brush tool is great for pinpointing specific problem areas without having to apply filters to the entire photo.
Step 11: I used the Exposure brush at +0.3 to lighten up the corner just a little bit.
Step 12: Next, I used the Temperature brush at -5 to cool down the backsplash.

You can see below in the before and after, I was able to touch up the image to make it look more like how it looked in real life- versus what my camera captured. I try to keep my edits as natural looking as possible, just the best & brightest version of the space!
