DIY SOFA / CONSOLE TABLE

After we bought our new couch, I knew there wouldn’t be enough room for a side table anymore. We needed to get a sofa table for behind our couch so we can easily set drinks or snacks down, and we also needed a lamp on that side of the room. All of the sofa tables that were the size I needed were either way too expensive or just not my style! Then it hit me to just make my own! This DIY took less than 20 minutes, and has been absolutely perfect for our space. Keep scrolling for the steps + materials!
This post contains affiliate links, which means I make a small commission from your purchase at no additional cost to you.
MATERIALS:
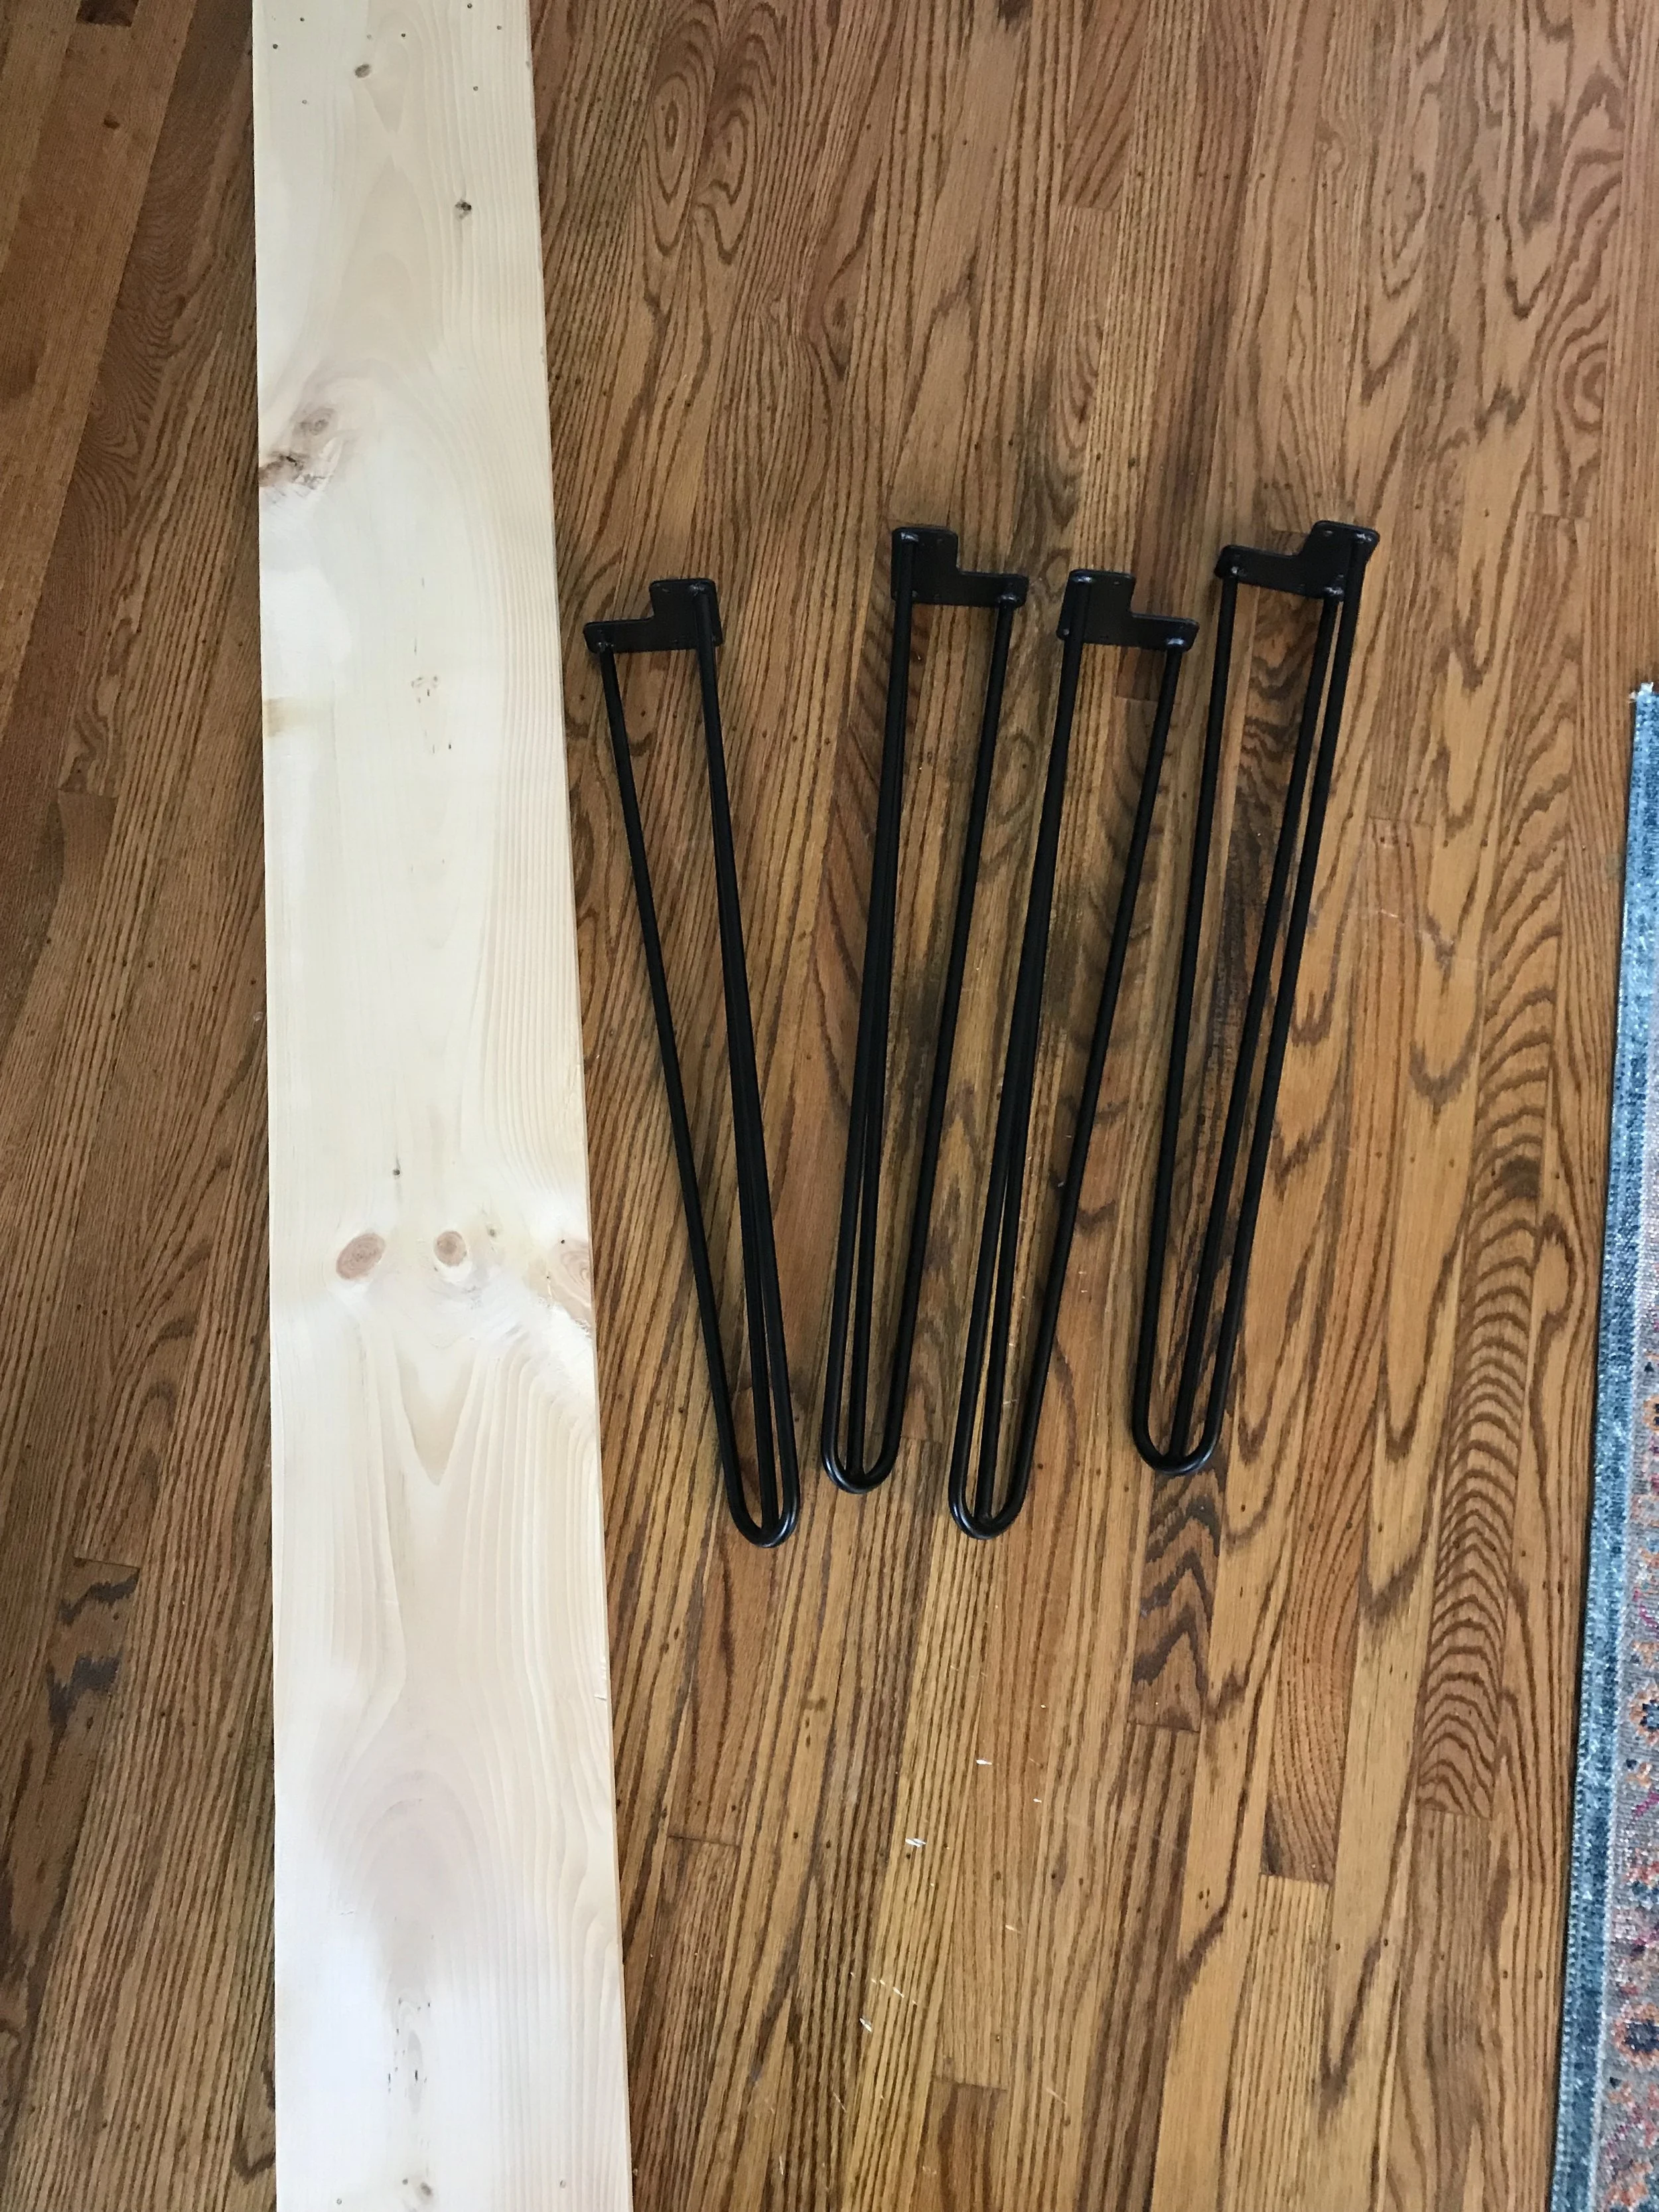
-1 piece of lumbar from Home Depot/ Lowes
(the piece I used was 1” x 6” x 10’… but if you need it to be shorter, you can easily find an employee and ask them to cut it down to the size you need — at no additional charge!)
-Hairpin legs
(I used 28” legs, but you can find pretty much any height you might need!)
**Also used screws, drill, and pen to mark holes
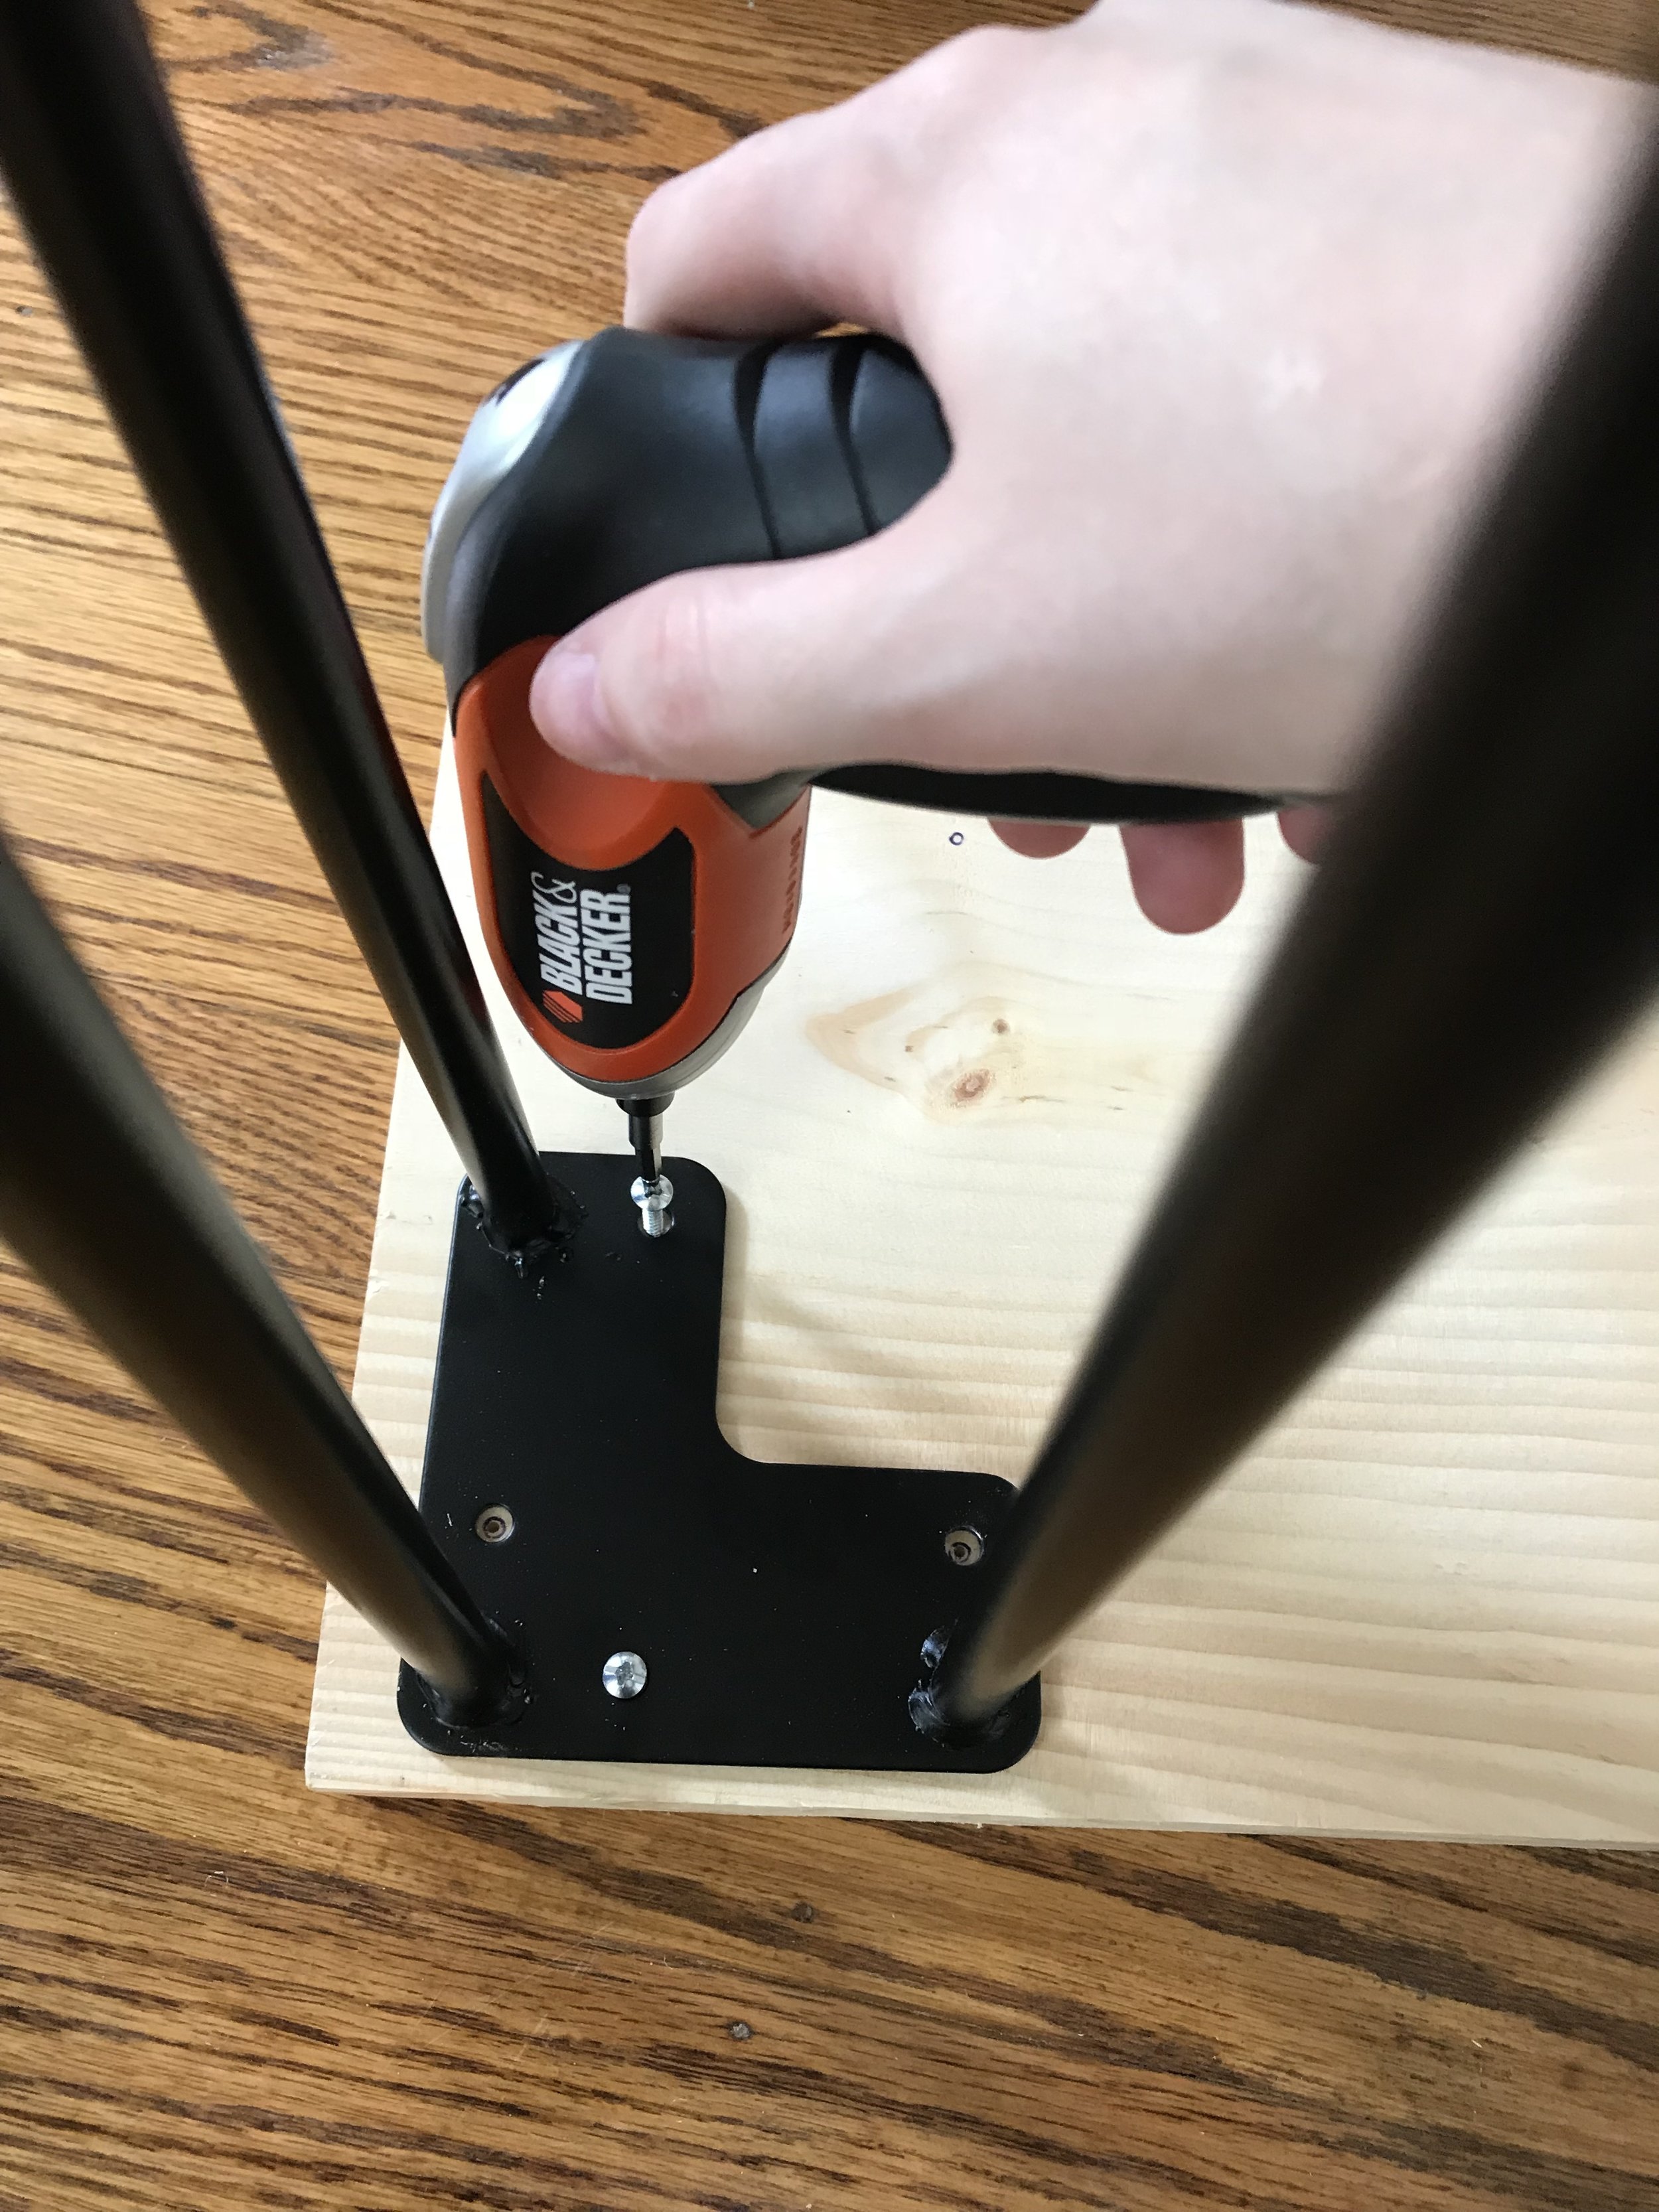
Make sure the screws you use are short enough so that they won’t drill through to the other side!
STEPS:
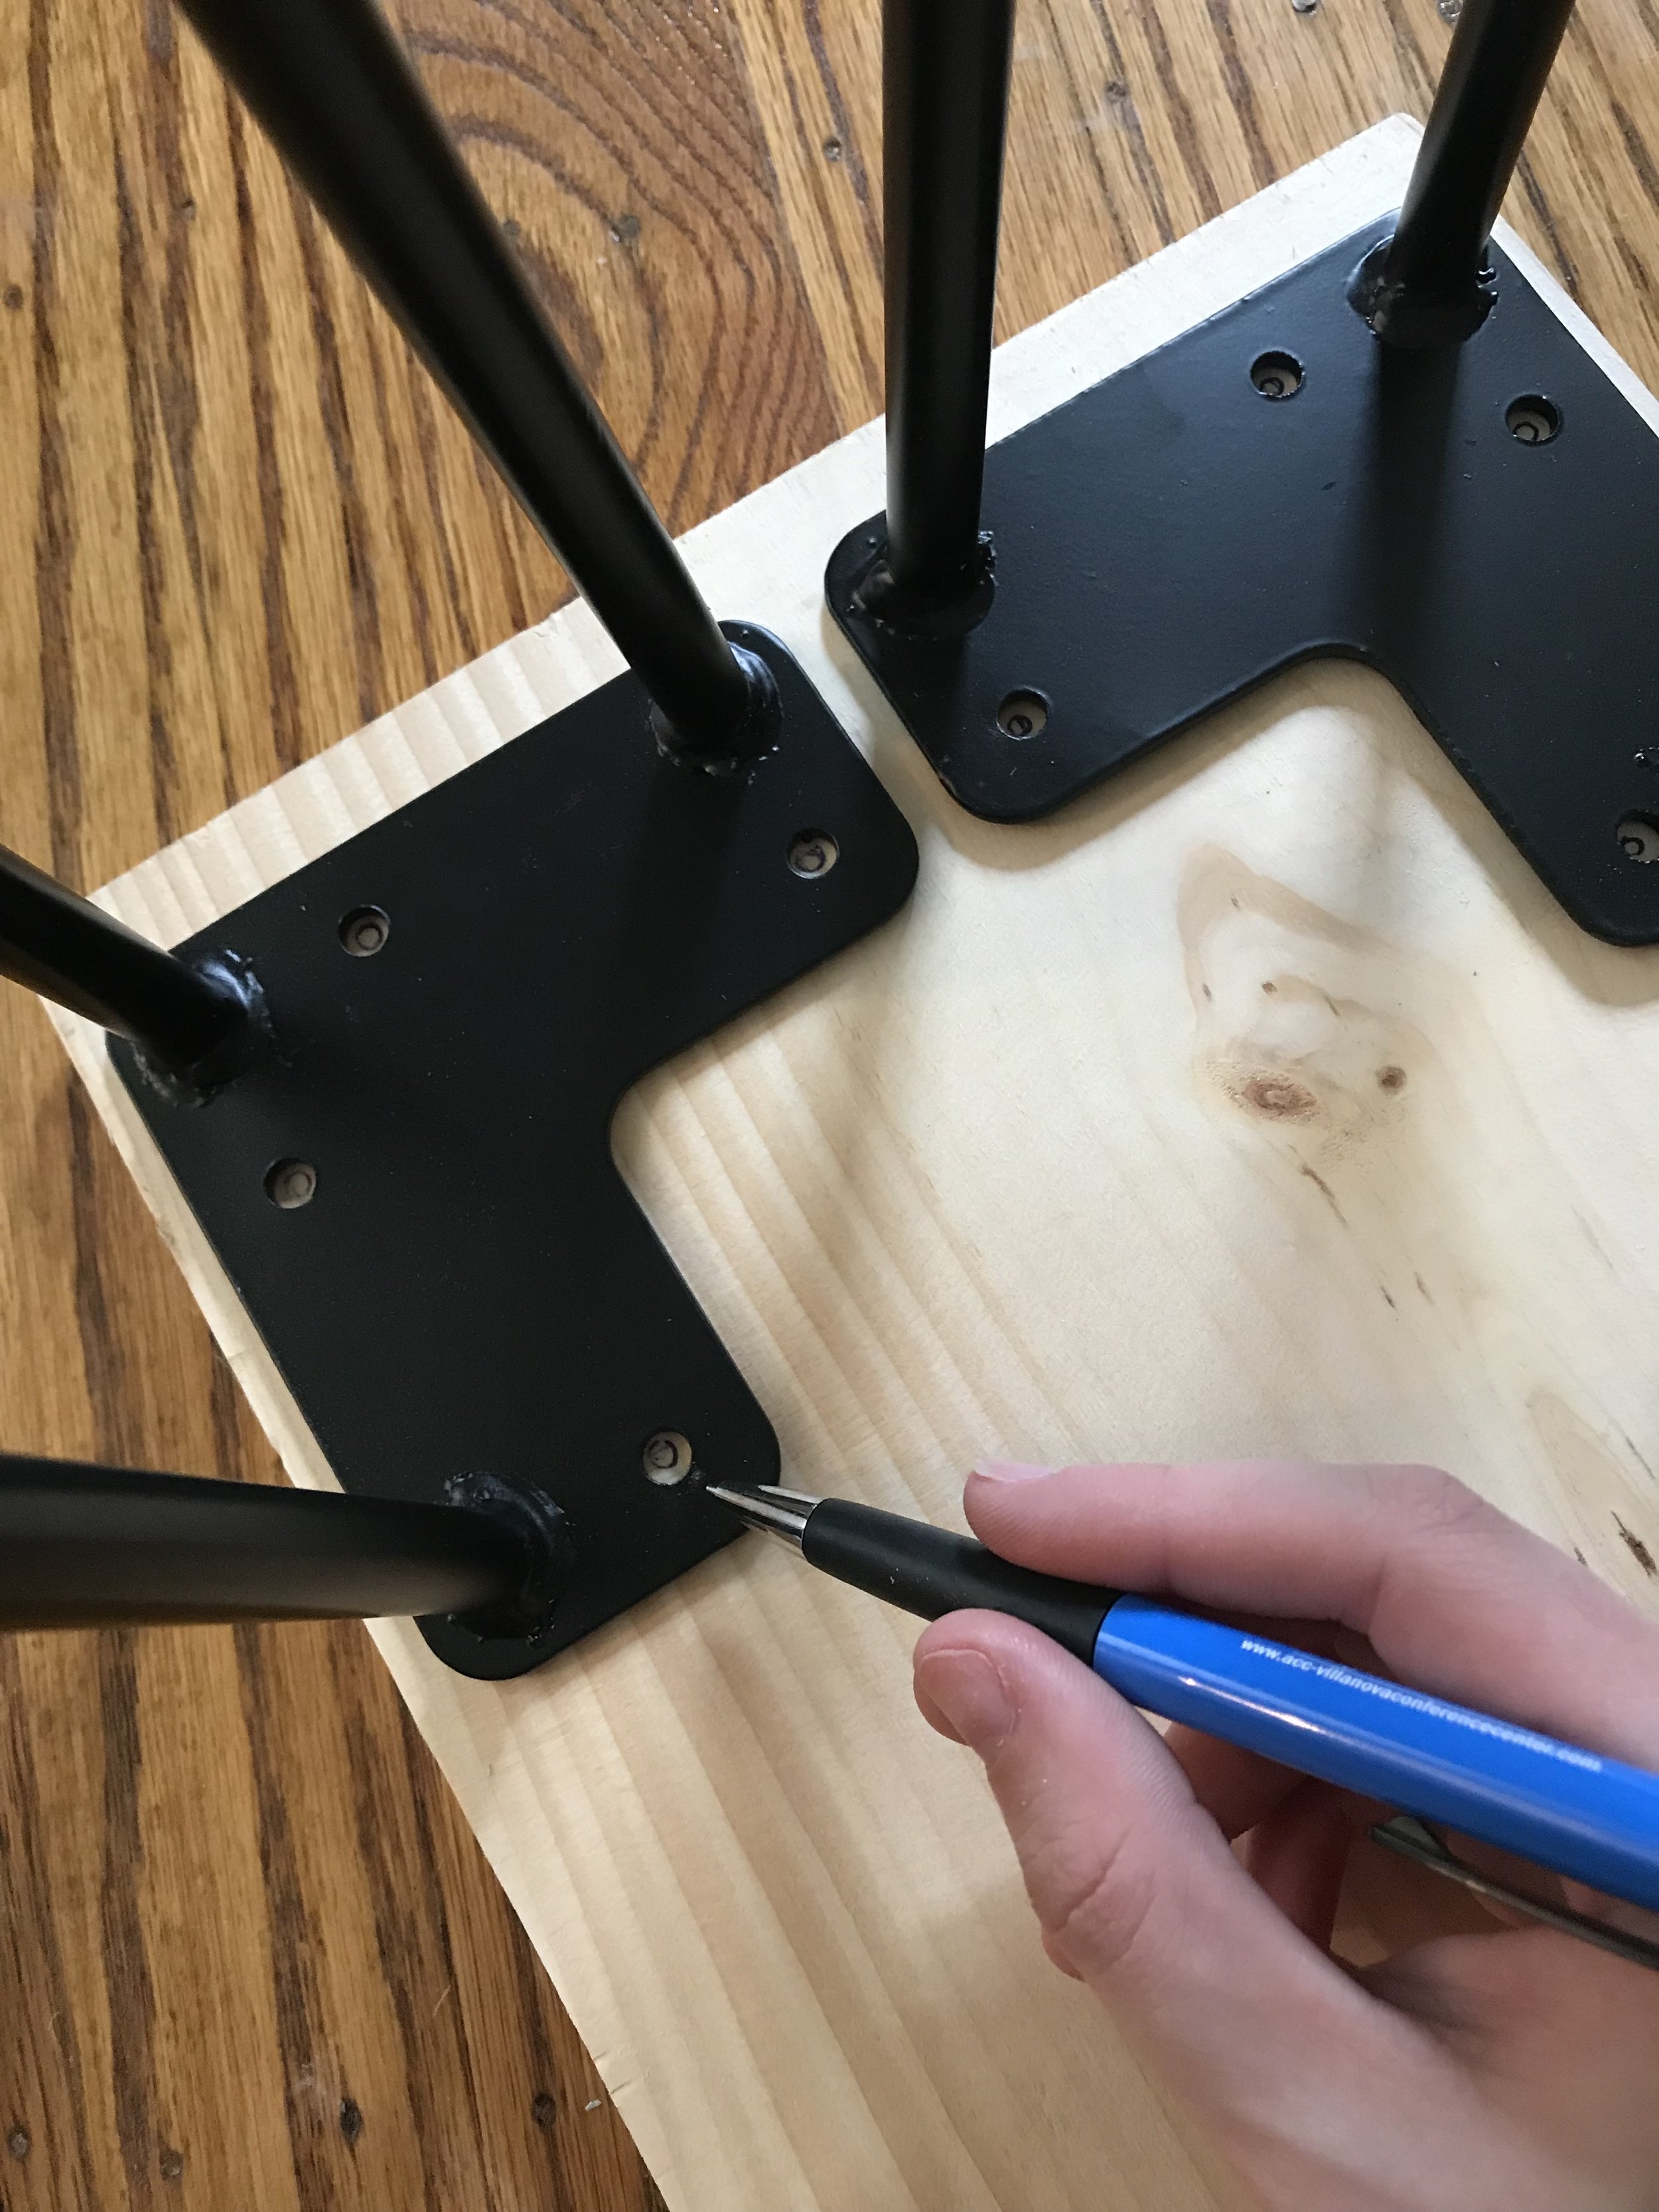
1.) Place the hairpin legs on the board where you want to screw them in.
2.) Use a pencil/pen to mark where the holes are.
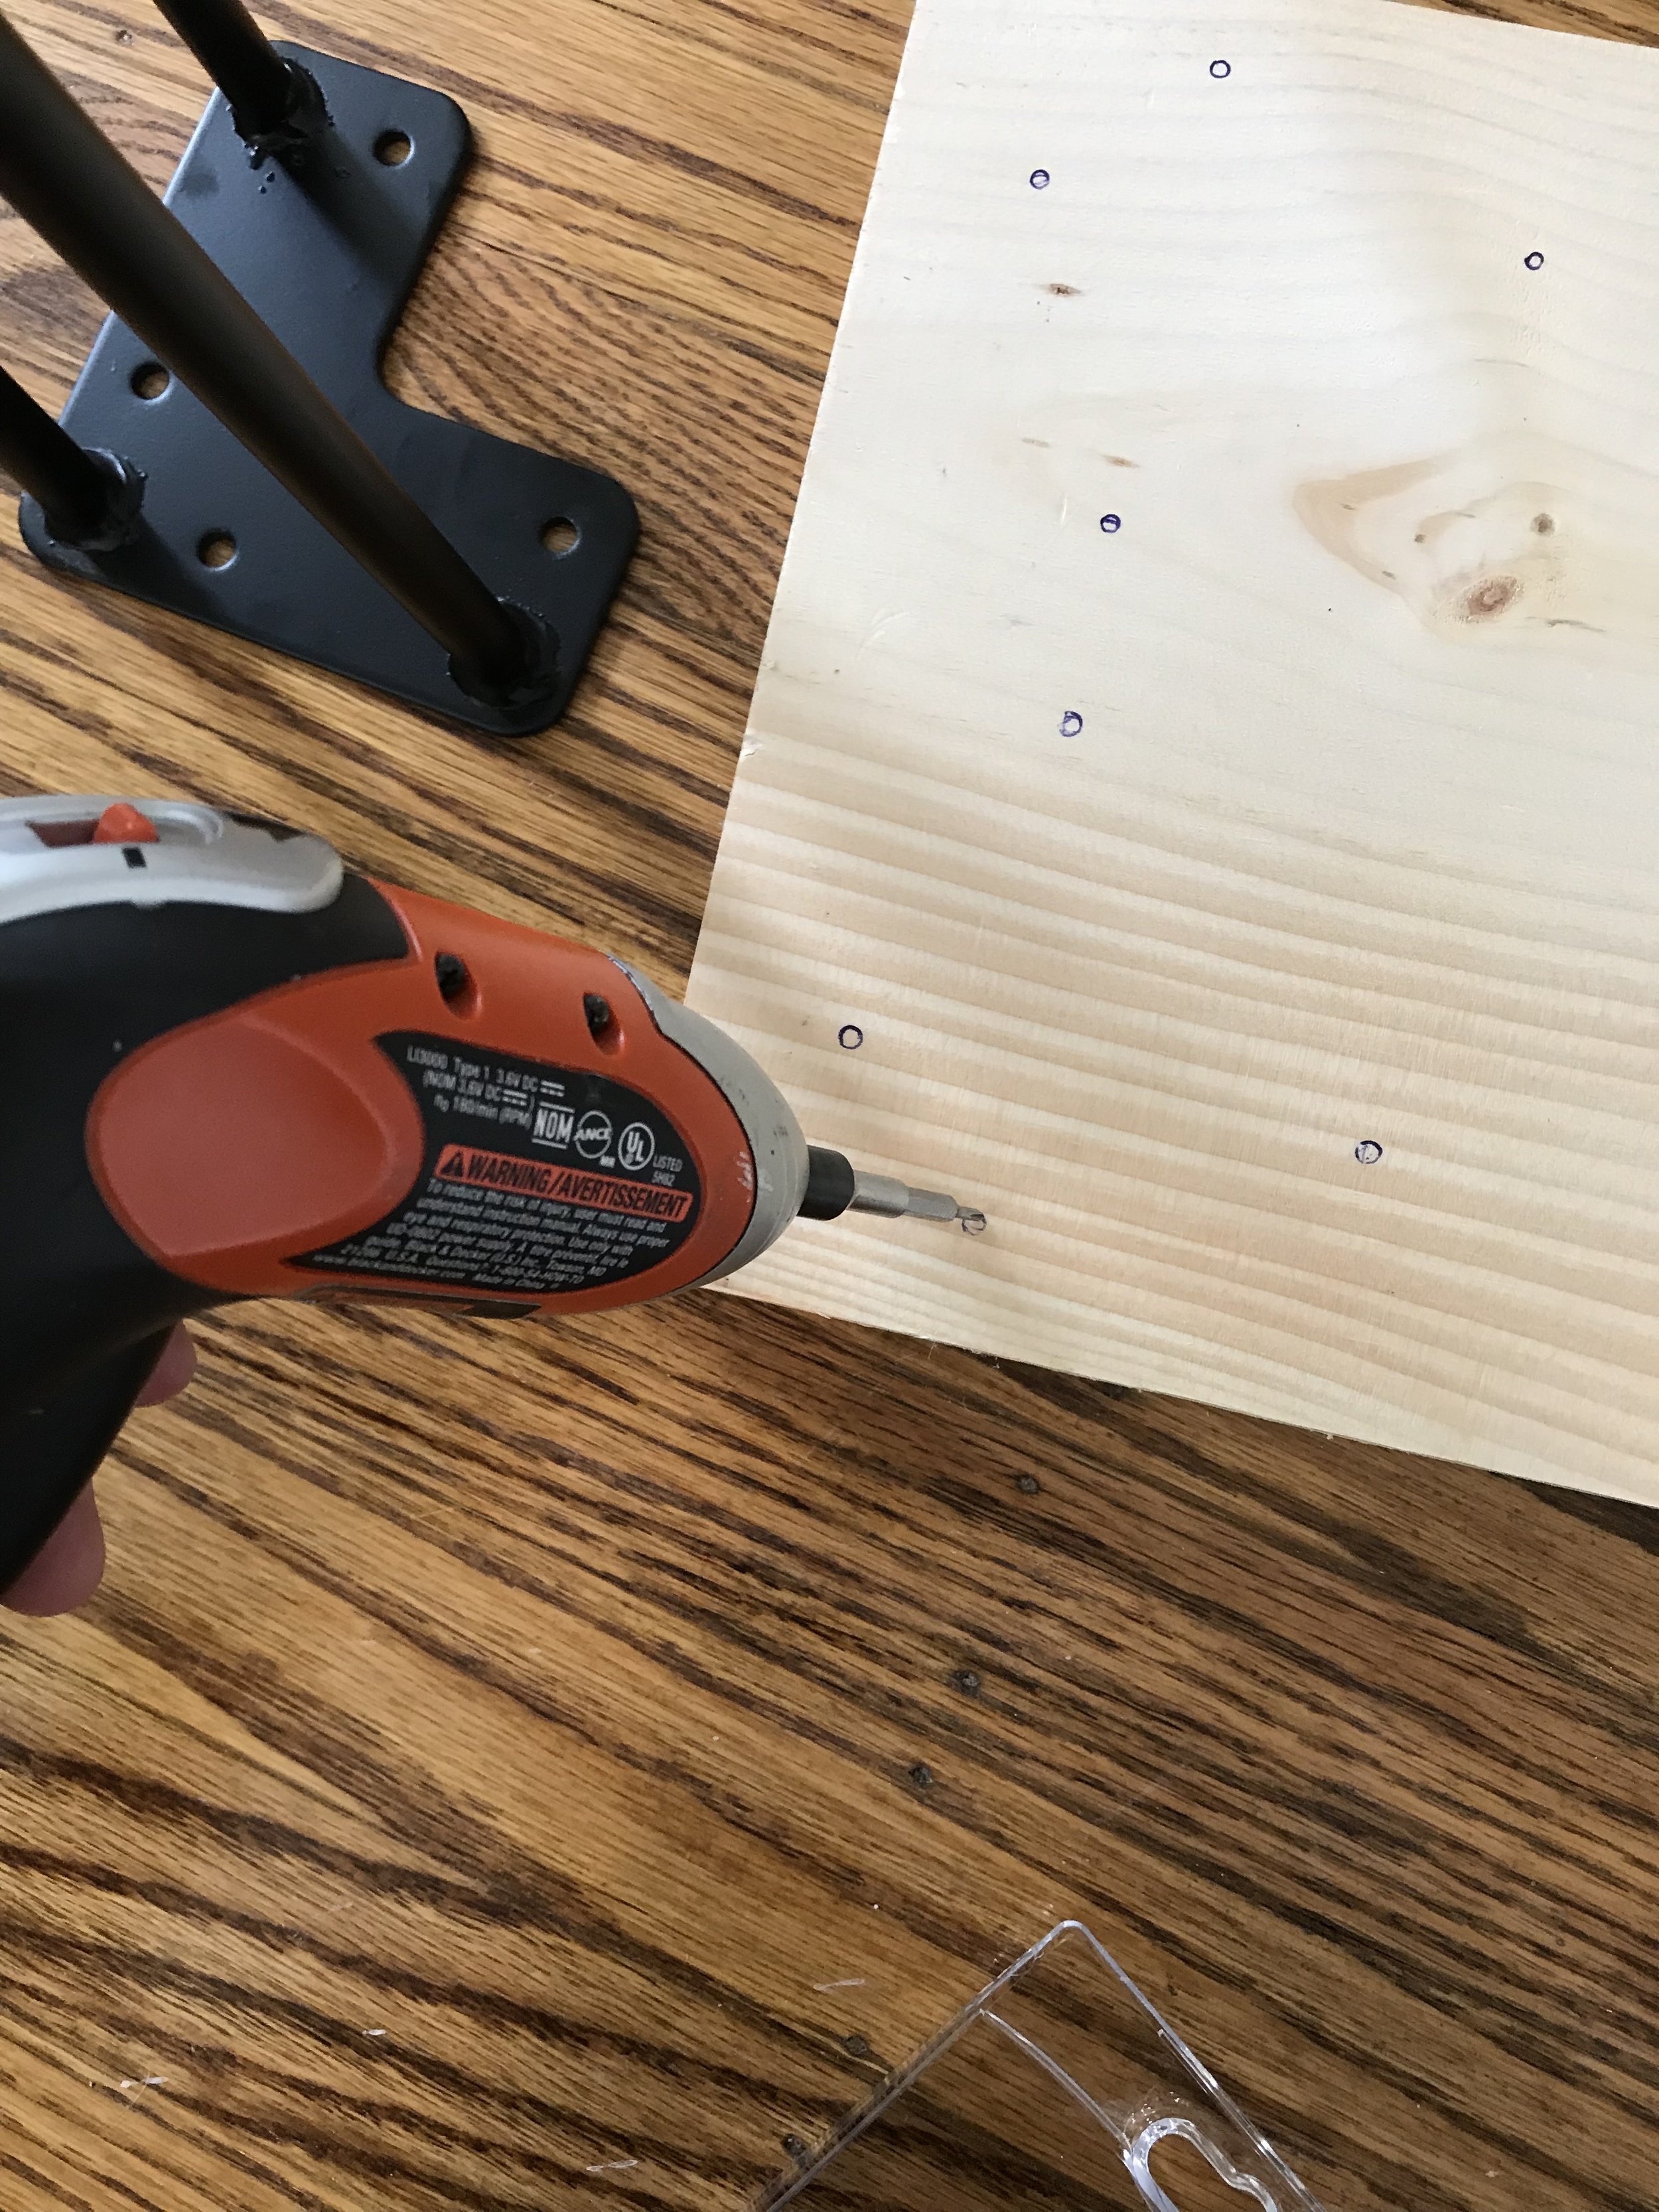
3.) Using a smaller drill bit than you plan to use for your screws; drill pilot holes where you marked in the previous step.
(This step prevents your wood from splintering)
4.) Put the correct size drill bit onto your drill, and drill your screws into all holes.
5.) Flip your new table over and enjoy!
* Due to the length of my particular table, at some point I will need to reinforce the middle so it doesn’t sag and break over time. I will update this guide once I do that!